






In previous discussions, many users have desired to add text (or fonts) to their photos via Picasa. Unfortunately the Google team is busy making Picasa Web Albums even better for us (a higher priority IMHO) so until then here is an alternative way to add text to photos.
Note: Since the world runs on Windows, this tip is designed for them.
Before starting, if you are looking to add fancy fonts to your posts, you can find some free downloads over at 1001freefonts.com, Dafont.com or SimplytheBest Free Fonts. If you are happy with the ones you have, simply continue below.
First, find the image you like and right click on it inside of Picasa. A menu should appear, allowing you to select which program to open the photo with.
Simply highlight Open With and after the side menu appears, choose the program you would like to open the image with (I would recommend Microsoft paint or Paint below).
If you are in MS Paint, a new window should appear displaying your image. Click on the "A" button to select the text on photo feature.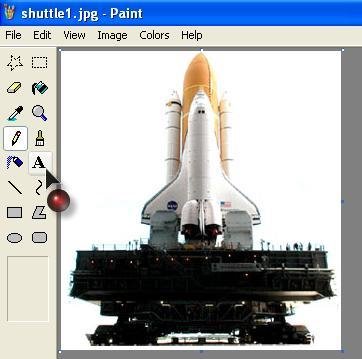
Also make sure you select the translucent text box (as shown below), otherwise MS Pain will fill in the text box area with a color.
Next, click on the image and draw out the box size that you prefer on your image (this is where the text will go).
Grrr....unfortunately Picasa will not let me upload the other screen shots. You may have to visit this web page to see the entire presentation (as I'll have to upload the images manually via Blogger or Photobucket.com.) 
Update: The show must roll on.
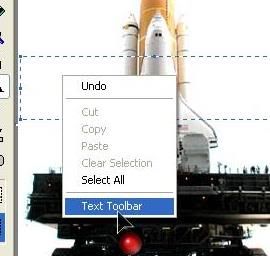
Right click on the text box area and after the menu appears, highlight the Text Toolbar option.
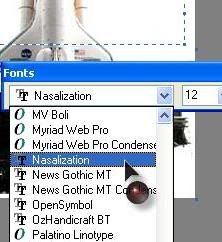
Once the toolbar appears, select the font that you want to use on your photo. You can also adjust the text size, and whether or not it is bold, italicized or underlined.
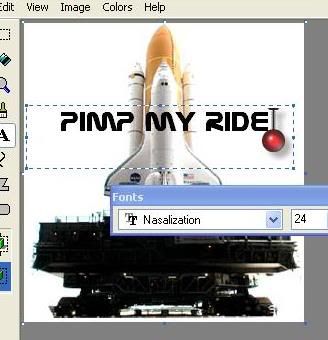
Type in the phrase you want to appear on your image. If you run out of space, either adjust the image size or delete your phrase and redraw the text box on the image for more words.
Now you are done! Simply save the image on your computer, and Picasa should update your gallery reflecting the new text on your photo.
Monday, August 07, 2006
Adding Text To Your Photos

Tuesday, July 18, 2006
Sharing Your Images (Via Hello)
For those of you who do not know, Hello is a chat program developed by Picasa which allows you to share images with your friends, neighbors, or even strangers. ;)
You can also use Hello to post to your blogspot blog, although it would be wiser using Picasa's button (I'll cover this later) as you can add titles for your images.
In order to post via Hello, you are going to have to download it from their website. If Hello is on your machine and you are having problems, see this post to resolve this issue.
After selecting your images, click on the Hello button below.
If you are not logged in, a screen should pop up asking you to type in your Hello screen name and password. Simply enter your info and press the Sign In button near the bottom right corner of the screen.
Another screen should appear asking you to select which friends you would like to share your images with. Since all mine were offline during this screen shot (a good thing), I'll use Blogger Bot as an example.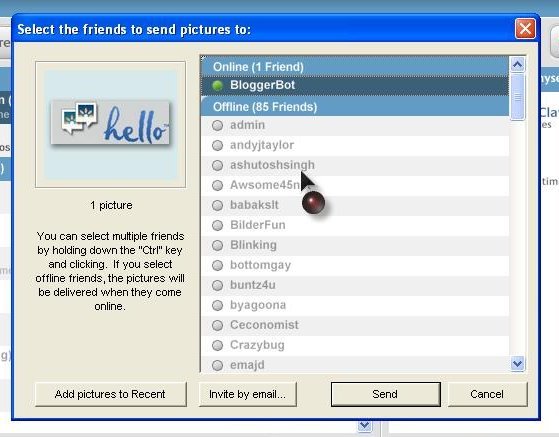
Your image should appear to the left. If your satisfied with how it looks, share it with your friend and don't forget to comment about the image you are sending.
Although this is a partial snapshot, you may notice the Send Recent button near the top. This allows you to send all of your recent images to your friends as well as review the ones you have shared with each other.
You can also send images to your friends while they are offline, which is pretty handy if you are in different time zones.
Monday, July 10, 2006
Sharing Your Images (Via Email)
One of the unique things about Picasa is that it presents seven ways for a person to show their pictures towards their friends. (there is an eighth way, but you have to become "a little geeky" in order to accomplish it).
Note: This is a seven part series, and I'll start with the simple ways and end on the more complex.
The first (and perhaps easiest) way to share your images is via email. Once you have selected your picture, simply click on the Email button near the bottom of your screen.
Next a screen should pop up, asking you which method you want to choose to send your email.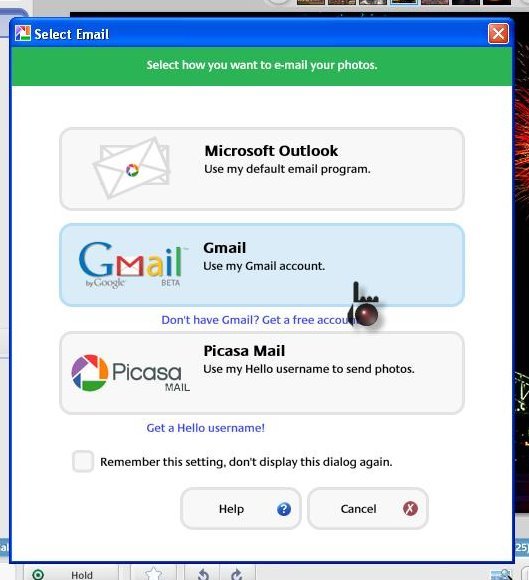
If you are a fan of Bill Gates, Microsoft Outlook is available for you to use. Since Gmail is better (in my opinion, so if you differ don't hate me) I am going to cover that method below. You can also use your Picasa Mail (which basically is your Hello screen name) but I'll cover that one later.
(Update: Picasa mail covered below, scroll down).
Next, Picasa will ask you to log into your Gmail account. Depending on your internet speed it may take a little while for it to go through.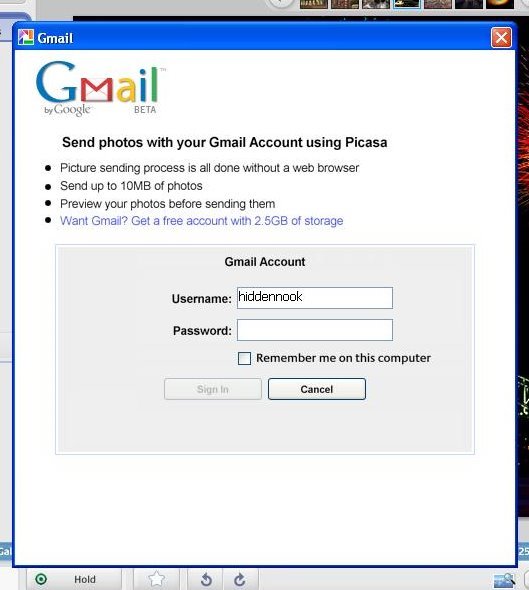
After logging into your Gmail, Picasa will automatically attach the photo to your message.
After typing out your message (and the email address on who to send it to) simply click Send (which is not highlighted in the photo above, but will be once you start typing.).
Update: For those of you who choose to select Picasa Mail, it basically sends the photos through the email address you signed up with via Hello.
Saturday, July 08, 2006
Dude, Where's My Picture?
Depending on which version of Picasa you have installed, you may noticed that Google's photo program is not showing all of the images on your computer.
This can be horrifying (especially after you have edited a photo) and instead of venting on how Google does not work for your life, these tips may help locate where your pictures are.
(Note: These tips are for the latest version of Picasa (version 2.5) so what you see on your screen may differ than what is displayed below).
If your smaller images are missing, simply go to the top of your screen and select View. After the drop menu appears, highlight Small Pictures and Picasa will begin to include these images with the rest of your collection.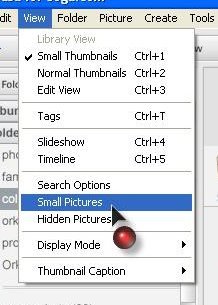
You may also want to highlight Hidden Pictures underneath it as well, just in case someone decided to play a prank on you and hide your photo's.
If you still can not find your images, this may be because of two reasons. Picasa does not like you (just kidding) or it may have excluded certain types of images from your collection.
To make them viewable again, simply go to the top of your screen and select Tools, then highlight Options.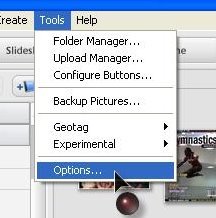
A window should appear with several tabs on top. Simply select the File Types tab, then check off all of the boxes (or those that you desire) for Picasa to include them in your collection.
After that click on Apply, then OK, and Picasa will update and organize those images for your viewing pleasure.
(Note: If you still are unable to find your images, then post here and I'll rack my brain in order to help you out.)
Thursday, July 06, 2006
In Search Of Color
Some users may not realize that Picasa is not simply just a photo organizer or photo editor. Picasa also enables users to search their pictures "in color" as well. If you look in the top right screen their is a search box.
If you type in color: [color name], Picasa will search all photo's containing that color. Here is an example below using the color black.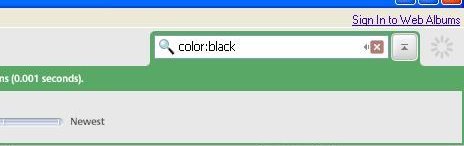
All images containing the color black will be shown.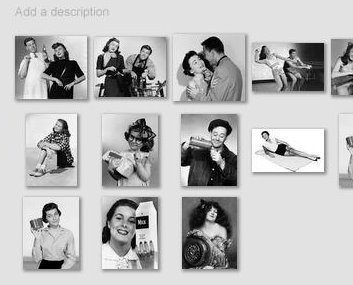
This code also defaults for the black and white photos as well, but if you wanted to see images containing red, typing in color: red would pull up a similar result.
Monday, July 03, 2006
Avoiding Picasa "Shrink Mode" Via Blogger

Well, it seems that after complaining about how Picasa was resizing images within my blogger posts, I scrolled through the help section and low and behold I discovered a solution to resolve this issue.
First select the image you want to upload into Blogger, via Picasa. After logging in, you'll either see your image or notice some "html code." Simply ignore that and click on the Settings button on the lower right hand side of the screen.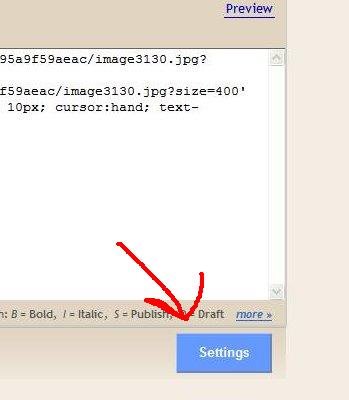
After doing that you will be directed towards another screen which will ask you how large will your image be. Simply select the Large circle and then save your settings. 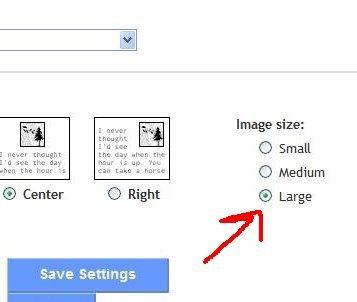
Unless you are posting wall paper sized photo's, this should resolve your image problems. If you need any more help with this, let me know.